Showing posts with label gift. Show all posts

Saturday, March 6, 2021

The Steps in Making a Quilt


There are 16 processes in making my quilts.


Here they are listed :


1. Have an idea

2. Select fabric 

3. Do the math to calculate sizes of fabric pieces

4. Cut fabric 

5. Sew geometric design (by hand or by machine)

6. Make the back

7. Layer using batting 

8. Baste three layers

9. Stitch (or quilt) three layers together (by hand or by machine)

10. Trim edges

11. Sew binding strip

12. Attach binding strip by machine

13. Turn edge and sew to the back by hand

14. Sign quilt using machine

15. Make label

16. Sew label on by hand


So much attention goes into selecting the right fabric.


So much care goes into making my quilts.


I write the number of hours it takes to make a quilt on the gift card.


How much would you pay for an original hand-made quilt?


Monday, November 30, 2020

Presents

Do you need any ideas for gifts this season? 

How about a pillow case? It folds up flat, weighs practically nothing making it perfect for mailing. AND it is perfect for any age!!

I've made lots over the years. You can see how it is done by clicking here. Easy for any skill level.

A tip: Use really good quality cotton fabric as this is an item that gets washed lots. I use quilter's cotton from reputable quilt stores.

Another tip: For your first one best stick to non-directional fabric. 

I've made this one for one of my kids...kids! He's in his 30's! Well, technically he is still my kid ;-)


It is to remind him his family members that live all around the world are thinking of him.


Great fabric! Post cards, stamps, fabric with words on it and that perfect highlight band- the air mail stripes.


Try one out!

Sunday, April 15, 2018

Baby Quilt

You wouldn't think this small quilt has 52 different fabrics in it.

baby quilt measures 30" x 42"

It is a simple, 9-patch construction, the centre square is the background fabric, here it is the colour Snow from Kona.......


and the alternate blocks are the opposite; the centre square being a fussy cut fabric- for storytelling!


The back fabric is shown below. The binding fabric is striped. I like putting stripes and florals together.

When I visit a quilt store I always look for a striped fabric to add to my stash, usually diagonal stripes which are difficult to find, and purchase a 1/2 m.  I use those for my bindings.


For this quilt, I bought the back fabric only. Everything else was selected from my stash.

My stash is primarily made up of leftover bits from other projects. Once in a while I purchase a fabric for something and realize when I get home that it won't work. That piece then gets put in the stash.

There were some leftover bits from the back fabric in this project. You know, the pieces you cut off after quilting when you square up the finished quilt.

This baby quilt is a gift for a new baby. I started quilting it by machine and decided it needed to be hand quilted.

Hope Lily likes it.

Sunday, July 10, 2016

You Might Like It...Eventually

I love the look of hand quilting.

My baby quilt has a few folds from being in my suitcase!

I have done very little of it myself.  My work is usually machine pieced and machine quilted, free hand. I have tried to like doing the hand quilting myself but it never clicked with me. I never had much success and it wasn't something I found pleasurable. It was definitely NOT relaxing.

Having the baby blanket up close as I quilt,  I enjoy looking
at all the scraps I used to make it.
I really do love scrap quilts,

I know how to do it...in theory, that is. If anyone asks me, I can tell them how to do it, how to hold the needle, that a shorter needle is better to use because you can "rock" it while you make the stitches, that the spaces should be the same size as the stitch length, to use hand-quilting thread that is usually a little thicker than regular thread. I can advise on what pattern would work well with their quilt design. But again, I have not made very many hand-quilted quilts myself.


I have a friend who has a shop near where I stay in Verona. In the afternoon, she sometimes sits outside if there are no customers and does hand work- knit, embroider, quilt or piece.


The other day I went out and asked her for advise on how to quilt by hand. She laughed because she could not possibly teach ME anything. But I sat beside her and we chatted and I just quilted and ...guess what? I actually DO like quilting by hand....after 25 years of trying to like it!


So I have brought my baby quilt here to the south of Italy where I am now holidaying. After four hours at the beach I come up for lunch and then do some hand quilting on the balcony.


It is very enjoyable....finally!


Wednesday, December 16, 2015

Easy Piecing Christmas Stocking

Every year at this time, I post a quick project to make as a gift. To see past ideas, click here, here, here and here.

This year I have the instructions for a Christmas stocking.  the technique I used is between foundation piecing and quilt-as-you-go, which I L-O-V-E!! It is fast to make and easy!

Finished craft!

Step 1: Fold a piece of thin batting in half and cut out a stocking shape. You will have 2 halves that will make one stocking.

Step 2: Cover the batting with fabric. *place the batting stockings on a table in a mirror image and cover the top part.

In the spirit of reducing my landfill footprint, I have chosen to use selvage strips which normally get thrown out. I have been collecting them for a while. I keep a box near my cutting table and toss them in there for future use.

Start by putting a 2 1/2 inch strip to cover the toe.
It isn't necessary to worry about what angle to put it on.
Lay a selvage strip over the first strip (good side UP) and sew through
the three layers- in this case the green fabric, red fabric and batting.
Use your walking foot for this.
It helps all the layers feed into the machine at the same time.
If you are not sure if you caught the strip below
with your stitches
 simply lift the selvage edge and peek under. 
If you don't have enough selvage strips add a few regular fabric strips.
Here I used a striped fabric measuring 1 1/2 inches wide.
Place good sides facing and sew a regular 1/4 inch seam allowance.
Flip and iron and proceed with selvage strips.

The covered socks should be mirror images of each other 

I had fun choosing the red and green selvage strips and finding fun words from the selvage I wanted to highlight.

Step 3: When the batting is covered in fabric, turn the stocking over and trim the fabric ends that stick out.


Step 4: Use this stocking as a pattern for the lining. Fold a piece of lining fabric in half, good sides facing.


Step 5: Draw the outline of the stocking. Make the top end about 1/2 inch higher. (This piece will be turned over at the end and will show on the outside of the stocking.)

Step 6: Cut out the lining part of the stocking on the inside of the pencil line which will make it slightly smaller than the outside part of the stocking.

Step 7: For the lining, sew using a seam allowance of about 1/8th inch and over a measure of 3 inches  gradually move the stitch line to a generous 1/4 inch seam allowance. Continue sewing all around the sock using the generous 1/4 inch measure until you have 3 inch left on the other side. From there, start angling the seam allowance so it finishes at 1/8 th inch. Do not turn inside out.

Step 8: For the outside of the stocking: If you want a hook for hanging, use a piece of ribbon. Make a small loop and place it in between the stocking halves, about 1 1/2 inch from the top. Using a 1/4 inch seam allowance sew the 2 pieces of the stocking, good sides facing, catching the ribbon. Turn inside out.

This ribbon came tied on a gift from my favourite quilt store.
Step 9: Slip the lining as is inside the stocking.

Step 10: Roll the top of the lining to make a small hem and roll that over onto the front side.

Step 11: Sew the lining overhang by hand using the blind stitch.

And the best part of all.... Fill it with great stuff!!!


Happy Holidays to everyone!

Monday, December 15, 2014

The Last Minute Gifts

Every December, I post about a gift that is fast and easy to make.


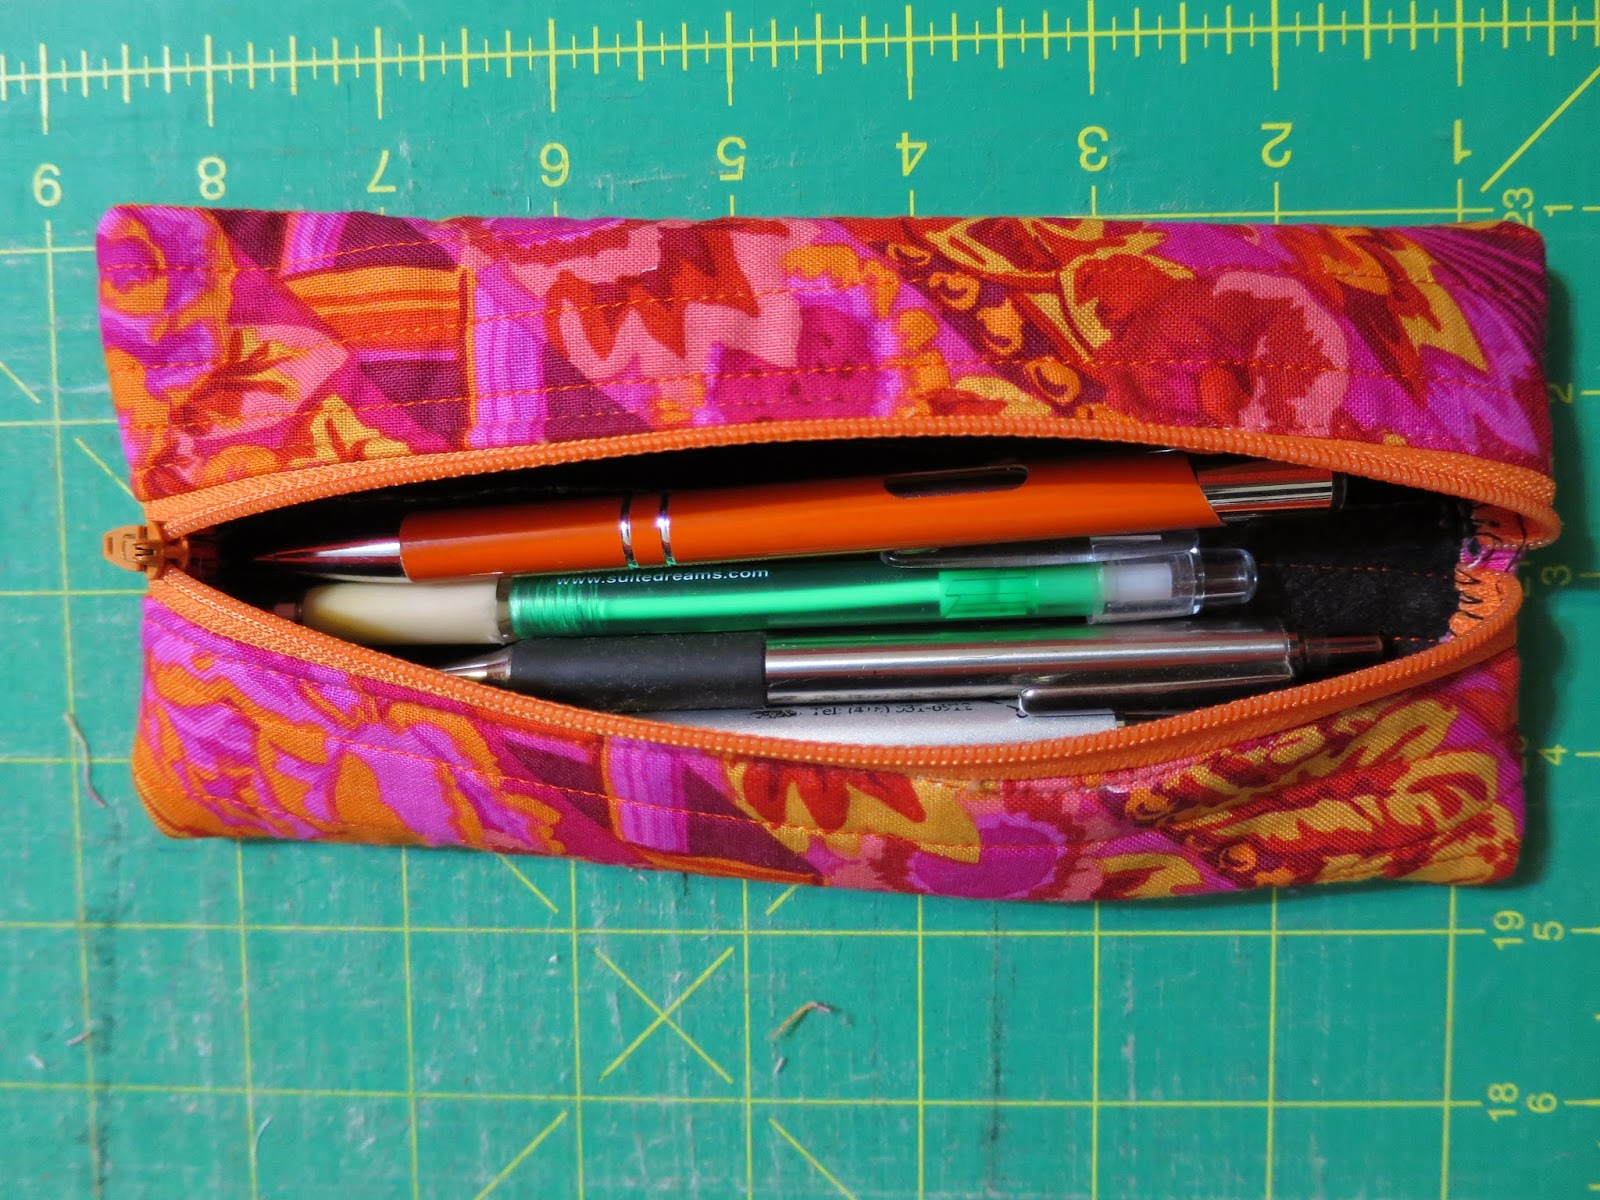
This year it is a zipper case you can make in no time at all! (I got it down to 15 minutes!)

Start with two pieces of fabric quilted onto a piece of felt. The fabric should be about the same length of your chosen zipper. For my size, I started with a width of fabric of about 4 inches.We will trim it later.

use your walking foot to quilt
straight lines lengthwise.
Change your foot to the zipper foot.

zipper foot

Add a zipper. Sew it on.

lay the zipper face down onto the fabric piece.
Undo the zipper about half way down.


When you get to the "bump" in the zipper (the zipper head) stop sewing and have your needle down into the fabric.  Lift the foot keeping the needle down and wiggle the zipper head closed. (that is the trick to zipper sewing- sew it on avoiding the zipper head) Continue sewing the zipper along the edge.


Place the piece of fabric with the zipper attached onto the other piece, good sides facing.


Unzip the zipper and sew it onto the other piece of quilted fabric. Do the same thing with the head of the zipper- sew until you get close to it then stop with your needle down, lift the foot, wiggle the zipper head out of the way.


Recap: You quilted some fabric onto felt and attached the zipper in between the two pieces of quilted fabric, right?

Flip what you just made so you can sew on the back side. Attached the 'seam allowance', if you will, to the felt. Increase your stitch length for this part. Essentially you are top stitching from the back side.


Do the same thing with the zipper head if it gets in your way.


You can trim the outsides now. Mine is about 3.5 inches from the zipper.


I change the thread colour at this point to the same colour of the felt.


Fold the entire thing in half, good sides facing, and sew the pieces together at the bottom.


I sew using a 1/4 inch seam allowance
Then I go back and zig zag the edge making
sure the needle goes off the fabric so
the thread 'closes' the edge.


Fold the 'tube' so the zipper is in the middle. Trim one end. Sew end closed at 1/4 inch seam allowance and zig zag the end.


Before repeating at the other end UNDO ZIPPER!!!!


Close up the other end same as you did.

your zipper pouch should look like this.
Turn inside out.


It is perfect for pens or sewing tools.


In mine, I keep my double-pointed knitting needles for my sock making.


I even found a perfect charm for the zipper!


To see past ideas click here and here and here.

Happy present making!


Sunday, August 24, 2014

Hand Work

No one in this town does stitching but many crochet. I have seen some beautiful things-table cloths and centro tavola, as they call them.

My friend Lina makes blankets. She used all her leftover bits of yarn to make this colourful work. She made hexagons and then sewed them together by hand.

Lina's crocheted blanket

She used the same pattern for this white one but made the flowers smaller. It is made of cotton.


It is a baby gift...although she is not sure which baby (sound familiar?)


She has them stored in a cupboard as she makes so many (sound familiar?)