Showing posts with label craft. Show all posts

Wednesday, December 16, 2015

Easy Piecing Christmas Stocking

Every year at this time, I post a quick project to make as a gift. To see past ideas, click here, here, here and here.

This year I have the instructions for a Christmas stocking.  the technique I used is between foundation piecing and quilt-as-you-go, which I L-O-V-E!! It is fast to make and easy!

Finished craft!

Step 1: Fold a piece of thin batting in half and cut out a stocking shape. You will have 2 halves that will make one stocking.

Step 2: Cover the batting with fabric. *place the batting stockings on a table in a mirror image and cover the top part.

In the spirit of reducing my landfill footprint, I have chosen to use selvage strips which normally get thrown out. I have been collecting them for a while. I keep a box near my cutting table and toss them in there for future use.

Start by putting a 2 1/2 inch strip to cover the toe.
It isn't necessary to worry about what angle to put it on.
Lay a selvage strip over the first strip (good side UP) and sew through
the three layers- in this case the green fabric, red fabric and batting.
Use your walking foot for this.
It helps all the layers feed into the machine at the same time.
If you are not sure if you caught the strip below
with your stitches
 simply lift the selvage edge and peek under. 
If you don't have enough selvage strips add a few regular fabric strips.
Here I used a striped fabric measuring 1 1/2 inches wide.
Place good sides facing and sew a regular 1/4 inch seam allowance.
Flip and iron and proceed with selvage strips.

The covered socks should be mirror images of each other 

I had fun choosing the red and green selvage strips and finding fun words from the selvage I wanted to highlight.

Step 3: When the batting is covered in fabric, turn the stocking over and trim the fabric ends that stick out.


Step 4: Use this stocking as a pattern for the lining. Fold a piece of lining fabric in half, good sides facing.


Step 5: Draw the outline of the stocking. Make the top end about 1/2 inch higher. (This piece will be turned over at the end and will show on the outside of the stocking.)

Step 6: Cut out the lining part of the stocking on the inside of the pencil line which will make it slightly smaller than the outside part of the stocking.

Step 7: For the lining, sew using a seam allowance of about 1/8th inch and over a measure of 3 inches  gradually move the stitch line to a generous 1/4 inch seam allowance. Continue sewing all around the sock using the generous 1/4 inch measure until you have 3 inch left on the other side. From there, start angling the seam allowance so it finishes at 1/8 th inch. Do not turn inside out.

Step 8: For the outside of the stocking: If you want a hook for hanging, use a piece of ribbon. Make a small loop and place it in between the stocking halves, about 1 1/2 inch from the top. Using a 1/4 inch seam allowance sew the 2 pieces of the stocking, good sides facing, catching the ribbon. Turn inside out.

This ribbon came tied on a gift from my favourite quilt store.
Step 9: Slip the lining as is inside the stocking.

Step 10: Roll the top of the lining to make a small hem and roll that over onto the front side.

Step 11: Sew the lining overhang by hand using the blind stitch.

And the best part of all.... Fill it with great stuff!!!


Happy Holidays to everyone!

Wednesday, February 18, 2015

Cultural Art

I love this art work! A friend bought it in Fiji about 40 years ago. It hangs in her living room on a gorgeous wall colour.


circa 5' x 6'


The Fijian masi cloth is made exclusively by women. They treat the bark of a Mulberry tree to make it soft and pliable before adding geometric designs.


The design motifs vary depending on the area it was made in. The designs can be printed, stencilled, dyed or painted free-hand.


To find out more about traditional Masi cloth click here.


Monday, December 15, 2014

The Last Minute Gifts

Every December, I post about a gift that is fast and easy to make.


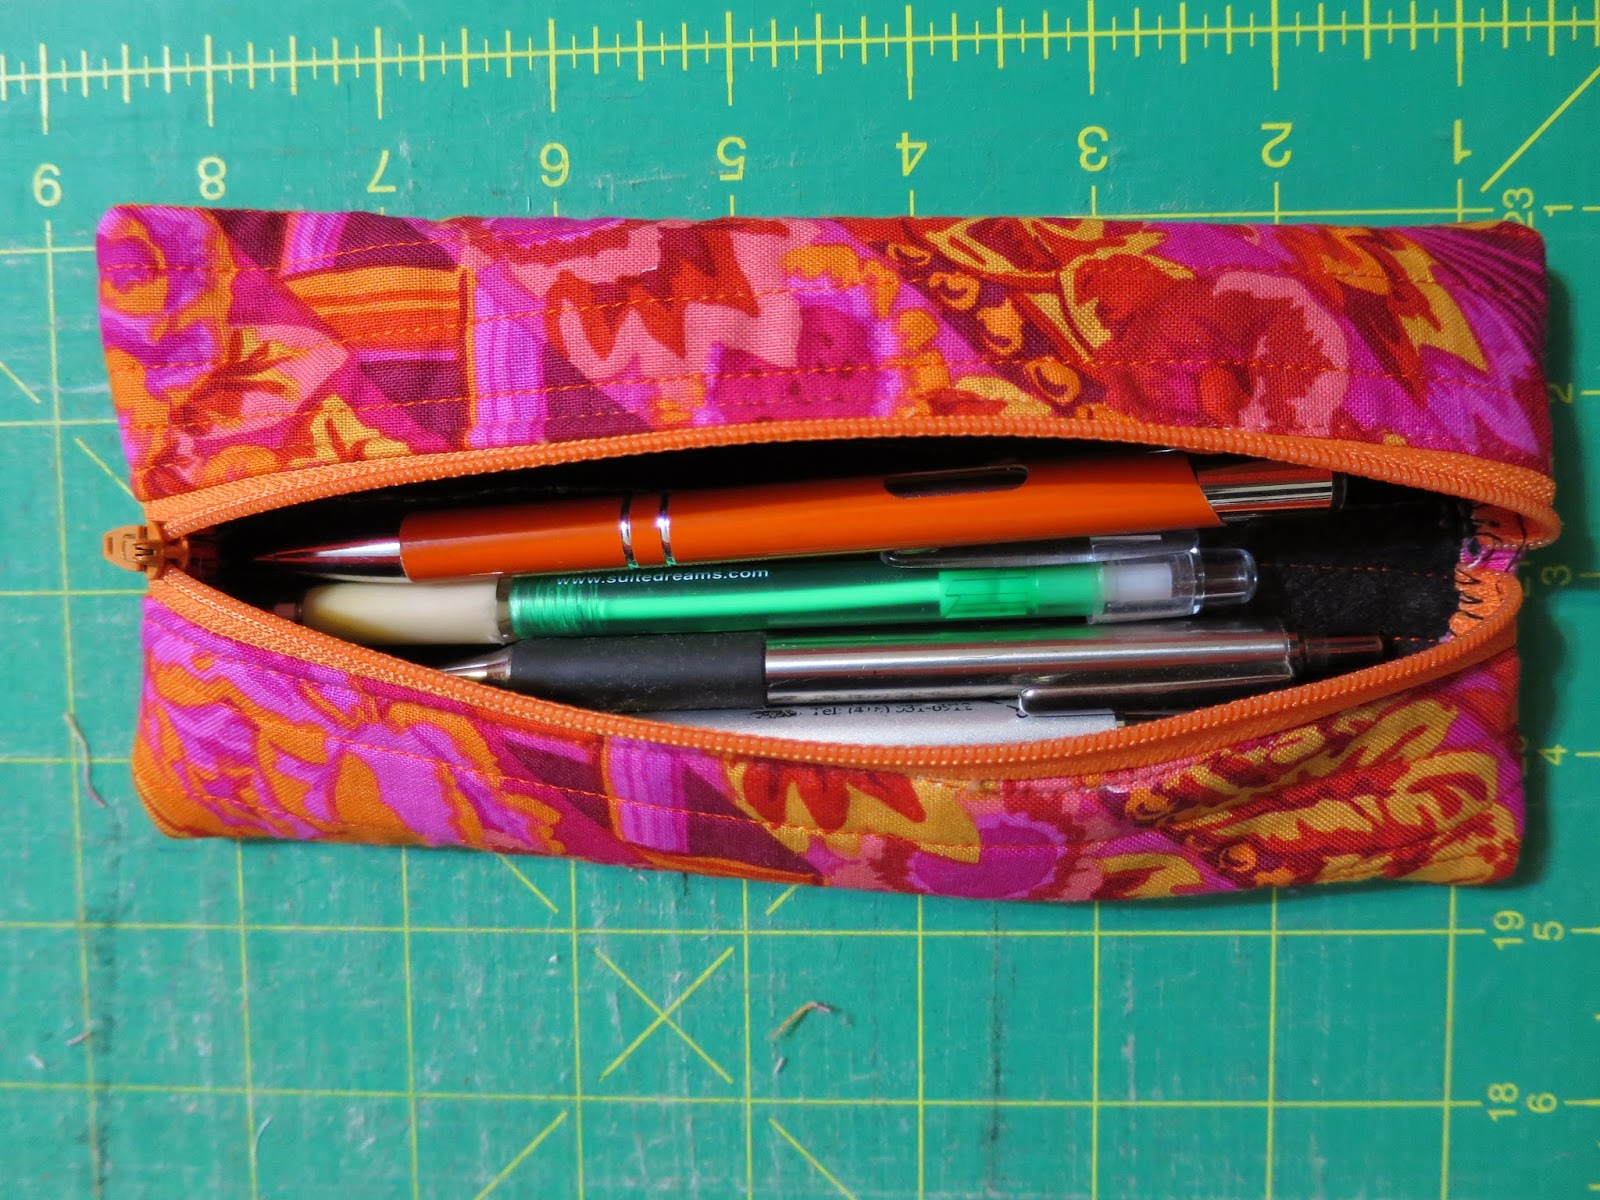
This year it is a zipper case you can make in no time at all! (I got it down to 15 minutes!)

Start with two pieces of fabric quilted onto a piece of felt. The fabric should be about the same length of your chosen zipper. For my size, I started with a width of fabric of about 4 inches.We will trim it later.

use your walking foot to quilt
straight lines lengthwise.
Change your foot to the zipper foot.

zipper foot

Add a zipper. Sew it on.

lay the zipper face down onto the fabric piece.
Undo the zipper about half way down.


When you get to the "bump" in the zipper (the zipper head) stop sewing and have your needle down into the fabric.  Lift the foot keeping the needle down and wiggle the zipper head closed. (that is the trick to zipper sewing- sew it on avoiding the zipper head) Continue sewing the zipper along the edge.


Place the piece of fabric with the zipper attached onto the other piece, good sides facing.


Unzip the zipper and sew it onto the other piece of quilted fabric. Do the same thing with the head of the zipper- sew until you get close to it then stop with your needle down, lift the foot, wiggle the zipper head out of the way.


Recap: You quilted some fabric onto felt and attached the zipper in between the two pieces of quilted fabric, right?

Flip what you just made so you can sew on the back side. Attached the 'seam allowance', if you will, to the felt. Increase your stitch length for this part. Essentially you are top stitching from the back side.


Do the same thing with the zipper head if it gets in your way.


You can trim the outsides now. Mine is about 3.5 inches from the zipper.


I change the thread colour at this point to the same colour of the felt.


Fold the entire thing in half, good sides facing, and sew the pieces together at the bottom.


I sew using a 1/4 inch seam allowance
Then I go back and zig zag the edge making
sure the needle goes off the fabric so
the thread 'closes' the edge.


Fold the 'tube' so the zipper is in the middle. Trim one end. Sew end closed at 1/4 inch seam allowance and zig zag the end.


Before repeating at the other end UNDO ZIPPER!!!!


Close up the other end same as you did.

your zipper pouch should look like this.
Turn inside out.


It is perfect for pens or sewing tools.


In mine, I keep my double-pointed knitting needles for my sock making.


I even found a perfect charm for the zipper!


To see past ideas click here and here and here.

Happy present making!


Monday, December 8, 2014

Crafting

I am making a few zippered pouches to give away as gifts.


I am using selvage edges to create a piece of fabric. Then I will sew up a zippered bag using that created fabric.

Start in the bottom right corner
of a piece of batting and
cover the batting diagonally with selvage strips.
The frayed edge of the strip gets covered up
with the selvage of the
strip that overlaps.
I sew along the selvage edge
catching the 2 strips.

In the past I have been collecting the selvage strips and sending them to a friend in New Brunswick. Click here to see her blog. She does all her quilts with selvage strips. I love her stuff!


I decided to try it myself and I love doing it! So fun. I now keep an open box near my cutting table where I can cut away the selvage of whatever fabric I am working with and save it for future projects. I also ask my students to contribute theirs!


The whole concept goes with my philosophy of using everything and reducing the garbage I produce.

It looks great!


Saturday, December 6, 2014

Last Few Classes before the Holidays

My Fall teaching calendar is coming to a close.

fabric scraps to use during the free motion class

Last weekend I taught a free motion technique class.

Student at work making her collage

I just felt so good after the class. The students were successful and all enjoyed their day. I did a good job!

This student decided to make her collage, cover it with a piece of fabric
then sew over all of it.
 She cut away sections of the top fabric to reveal
some of the brighter fabrics underneath.

 I love sharing my ideas. I know the students will be applying the techniques they learned when creating their own quilts, art projects, crafts and even felt work!

Using the darning foot to create curved designs.

I have two more classes left to teach before the holidays. There are still places for the paper piecing class. 

I bought a small envelope like these (above) many years ago made by
Toronto artist, Carolyn Flood.
I altered her design slightly and use them in my Free Motion class
so the students can practice the techniques they learn
 in the first half of the class.

My last CQ (Club Quilt on Thursday mornings) is this week also open if you want to come and sew whatever you are working on for a few hours.

I am preparing my Winter teaching schedule so check here  later.

Thursday, April 3, 2014

Birthday Presents

My niece turned 11 yesterday.


I made her two pillows for her room using a pineapple quilt block as the front.

I used old shirts for the backs, therefore forgoing the time consuming step of button-hole making.
(Clever idea from teacher Johanna Masko)

Men's shirts used for the backs of pillows.

The pineapple block centre is perfect for fussy cutting a special design.


I made a pineapple block quilt about 20 years ago. I used the traditional foundation piecing method. But the method I learned at the Workroom was shorter and one could square-up the block after each addition. It was great! I had a fun time and did learn some things even though I have been quilting for about 25 years.


Fun centre cut.
If you don't have enough of the same fabric to make 4 strips
you can use two different fabrics and place them facing each other
in the round. Your eye tends not to notice the differences that way.

For the first pillow I made, I started with the shirt colour.

I picked up this shirt at Goodwill for cheap and
resewed the buttons using embroidery floss in a nice colour.

Then I chose the corner piece from my stash, which went well with the shirt.


From there, I went through my 1 1/2 inch strips and selected the blues and whites.

I'd like to make a full-size quilt using darks with brown and orange strips. The design that appears when each block is put together is very effective.

Photo from the book Quilts by Judy Wentworth,
published by Crescent Books
This quilt is from the 19th century, thought to be
made by a plantation slave in the southern United States.